GeoSpatial Technologies
While GIS and GIScience refer, respectively, to the system and the field of study in such systems another term that is important for us here is Geospatial. Geospatial data refers to any type of data that has a geographic or location component while geospatial technology refers to the technologies that work with locational data.
Geospatial technologies have become ubiquitous because geography/location is a component of everyday decisions that individuals must make. And you know that businesses and organizations are “geo-enabled” to get insights into operations, consumption, distribution and marketing. We can expect that the reach and impact of geospatial technologies will continue to expand, and it seems that computational technology will lead the way, and GIScience will follow.
It is hard to think about Rilive and airbnb without considering how location is so central to those services.
Geospatial technologies and anxieties of privacy and control
An exploration of this is beyond the scope of this course but see the links below with respect to privacy concerns surrounding the use of data collected on your cell phones.
Google “Data Retention”
Google says it will not mine emails anymore
Google and location information
IPhone “Privacy for Location Services”
Phone User Data
Apple Privacy Policy
Apple Locations Policy
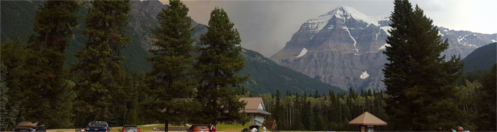
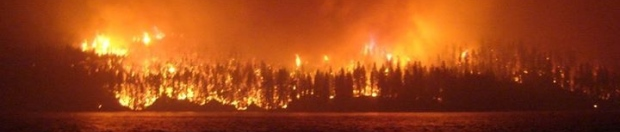
The images below are presenting different aspects of the wildfires in BC in 2017. Each photo has a story attached to it, but all of them can be made use of with GeoSpatial software – such as what we will be using this semester.

Working with GeoTagged Photos
For this tutorial, you will not collect geotagged photos using your smartphone, however below are the steps you can follow if you want to do so.
Setting your phone to use locations for photos
Set your mobile phone up to use location services. Be aware that this opens you up to be tracked by the operating system (Android/Google IOS/Apple).
Below are the general steps for iPhone
– Open settings
– Hit Privacy
– Choose Location services
– Choose the Camera App
– Set permissions to allow location access to “while using the app”.
Below are the general steps for setting location services for Android
– Open settings
– Find the location setting and turn it on
– Open you camera app and check its settings – turn on locations (sometimes called location tags)
If you choose to collect some photos
Head out during the week and collect some photos. Collect them in a variety of places.
After you have collected a bunch of photos, move the photos to your own computer. It may be easier to email the picture to your UNBC account (any email account will work as long as you can download them to the computer).
Connecting to Osmotar
The instructions are here, scroll down to the “Connecting Using Windows” section.
https://gis.unbc.ca/support/remote-access-gis-servers/
Download GeoTagged Photos
Go to the url below and download two or three geotagged photos. Make sure you use the Show Photo button before you download the image.
https://www.geoimgr.com/sample-photos.html
Using our GeoTagged photos with GPSPrune and Google Earth
GPSPrune is a simple application for working with coordinate data collected with GPS-enabled equipment.
Downloading and launching GPSPrune on Osmotar
GPSPrune does not need to be installed because it is a JAVA program. All we need to do on osmotar is download the file and launch the software by double-clicking on it. We will do a bit of setup for Firefox before we download the software however
Setting up Firefiox for easier use
Let’s set up the Firefox browser to better suit our needs by:
- Open up Firefox
- Click the “Open Menu Button” . This is the pancake button far right that looks like this image

- Select “More tools” –>”Customize toolbar…” (a new tab should open)
- Click the “Toolbars” drop down menu item–> check the “Menu Bar” option
- Click Done to save and close the Customize tab
- Select the “Tools” menu from the new menu bar on the top of the browser
- Click “Settings“
- Under “Startup” choose “restore previous session“
- Scroll down to find “Download” section and choose “always ask to save files“
This should make it easier to download data in the future using Firefox.
Download GPSPrune
Download GPSPrune using the link below and save it to your k: drive (perhaps create a folder called sofware first):
https://activityworkshop.net/software/gpsprune/gpsprune_20_java6.jar
Launch GPSPrune:
Navigate to your K: drive in the windows file explorer and double click on the file you downloaded for GPSPrune.
Creating a Google Earth layer from your photos using GPSPrune
Follow the steps below to produce a KMZ file for use in Google Earth or QGIS.
- Move the downloaded photos to your geog204 tutorial folder ( if you collected some from with your camera or phone, emailing the photos and using the UNBC Outlook Web App is a simple way to get photos to you K: drive)
- In GPSPrune –> Photos –> Add photos –> select the folder with the photos
- Check to see if the photos have locations information
- Alternatively you can add a webmap basemap to GPSPrune (View –> shop map)
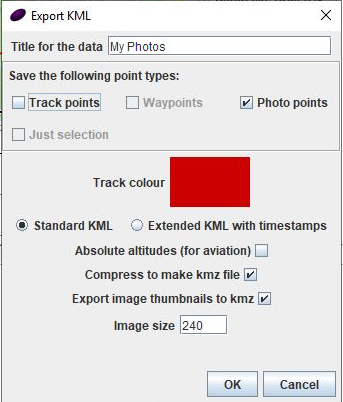
- Export the photos to a KMZ file (File –> Export KML)
- Give the export a title, turn off Track Points and set the export to be a compressed KMZ (check out the image below)
Open the layer in Google Earth
Launch Google Earth on Osmotar and load the layer by File –> Navigate to the KMZ file.
This layer can also be loaded into QGIS in the same fashion as loading the shapefiles.
Some reading of interest….
https://www.cnn.com/2020/04/04/tech/location-tracking-florida-coronavirus/index.html
Summary
We have explored the ubiquity of Geospatial Technologies. Taking an example of geotagged photos we have explored how geospatial technologies (hardware and software) can be used to collect and present location-enabled information.