Enterprise data security and safety
Ensuring your data is safe is part of being a Spatial Data Manager. Today we are going to look at backing up our database and then taking a look at versioning data in PostGIS through a QGIS plugin.
Backing up your data
Backing up the the easy way
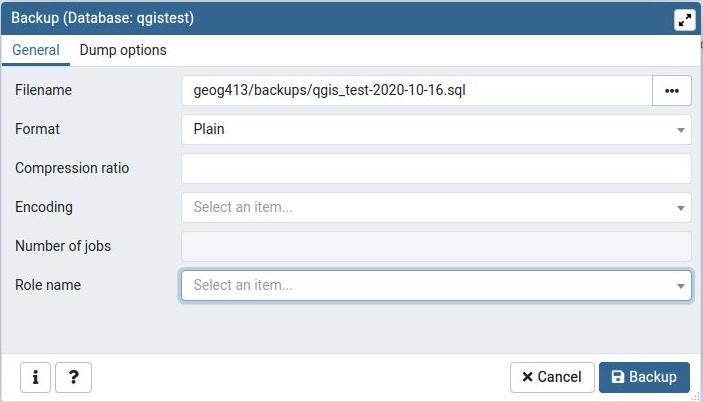
The easy way to back up data is to use a tool such as PGAdmin. This is very simple.
- Open PGAdmin
- Right click on the database you created –> Backup
- Give a name for the file (you need to create a folder and type in the full location)
- Ensure you have the plain type selected
- Hit Backup
Take a look at your backup
Use and editor like gedit to have a look at the backup file you just created. You can only see it briefly – as it is a big file. If you are keen, you can use the nano editor to look at it, or the more command:
nano nameofthebackup.sql
more nameofthebackup.sql
Refresher – Create a fresh database with PostGIS
See if you can remember how to create a fresh database that has the PostGIS extension. Once you have created a database we are going to add a new schema and copy in some data.
Creating a new Schema
This is easier than you would think:
- Create a new database connection – the example has a database called versioning
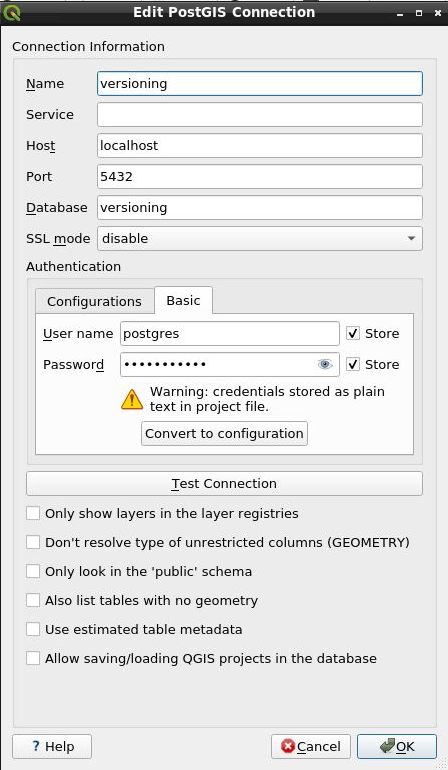
- Right click on the new database and – you guest it – Create Schema
Move some data to you database
You should still have a database with the wildfire polygons in it, if not load that layer (it could be the original GDB file from fileshare) at zoom in to the large fire west of Williams Lake (remember 2017!). You may want to use the QuickMap plugin to find it.
Select out the large polygon (fire_number C10784) and save as a new layer to you new schema in your new database. Once that is done, grab another fire that is near this one (i.e. fire_number G40198) and add it as a new layer to the same schema.
Grouping you data
To make things easier to see what is going on, remove all the layers in your canvas and add in the two new layers you put into the new schema. Once they are in, group them and give the group a useful name:
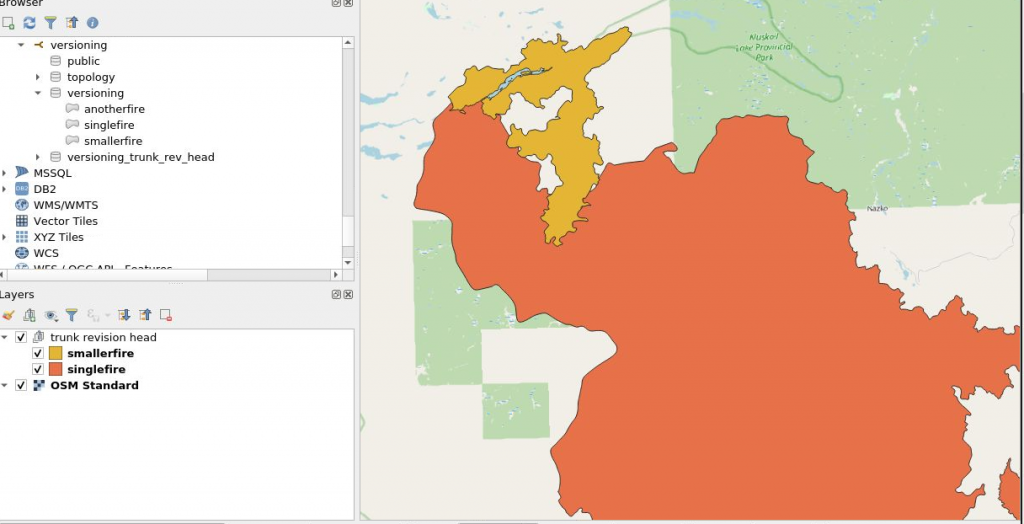
We can actually get away with a single fire in a group of one, but for reference – we now have two layers from one database in one group.
Adding the versioning plugin – not easy this time
Because it is 2020 adding a plugin for our class has to be a bit difficult. As we are struggling with hardware (so fileshare may be down), and they have not patched the plugin properly – we get to take a crack as this ourselves!!
- Add in the versioning plugin as you would normally
- Then open an editor and open the file:
- /home/username/.local/share/QGIS/QGIS3/profiles/default/python/plugins/versioningDB/sql/historize.sql
- (do not forget the “.” in front of .local
- replace “adef.adsrc” with “pg_get_expr(adbin,adrelid)” (there should only be once instance)
We now know where plugins are installed in QGIS… If all went well, we can now initiate versioning.
Start versioning
If you have the plugin installed and the group set up and highlighted, you should get a big green “V” to click to start versioning. Click that button and hit OK for warning.
You will get a new menu allowing versioning in the database, or offline editing.
Check out the changes to your database in the DBBrowser and in PGAdmin. What is happening inside the database?
Being adventurous
You can try versioning by
- checking out a PostGIS version

- Make some edits to the layer (i.e. move a vertex)
- Check it back in and see the commits
