Impressive sounding
It really sounds cool to use the term”Enterprise”as well as “Relational Database”. We get to use them both today. The terms are definitely not as impressive as they sound. We will go over the concept of relational models for spatial data in lecture, but for today – we are going to install an extension for our Relational DataBase Management System (RDBMS) to spatially enable our databases.
Clean up first – fixing the broken package for ProjectLibre
Let’s take a crack at fixing the package we installed last week. If we cannot get it fixed – we will remove it.
Fist steps – whenever you log into your VM
- Promote your privilege to root (sudo su – root)
- Check out where you are at with packages
– apt update
– apt upgrade
– upgrade the packages today – “y”
If you are asked to reinstall projectlibre, navigate to where you downloaded the “.deb” package and issue the command:
dpkg -i projectlibre_1.9.2-1.deb ( this may have more errors – but it should eventually install – even thought it seems as though it is installing)
Redo the update and upgrade commands to get your system up to date.
If we cannot get projectlibre to work – we will remove it by using the purge command.
Using Synaptic to install x2go
To make our lives easier, and since we managed to have everyone in the class using the VPN, we are going to install synaptic.
Synaptic
Exit the root promoted level in your terminal by typing – you guessed it – exit. Now type:
sudo synaptic
You should need to provide your password again, but you will see the groovy package management gui.
Search out x2go. You should get a fairly long list, navigate to x2goclient and clink on it to see a decription. Test out the “get a screenshot” button. Close the screenshot window.
Install x2go server by:
- Click on the x2goserver.
- Click on the square box on the left and choose “mark for installation”
- Allow for other necessary packages to be installed
- Click on the apply button
Once we are finished this, we will test it.
X2go Client install
On your home computer search x2go in a browser. If you take the first link you should get yet another basic open source type of web page. There should be a green section for “get”ting x2go. Choose the version that suits your operating system, and install it on you computer.
Once finished, launch the software. You may be asked to permit the software to make rules for your firewall – approve the request. You should get a x2go panel. Hit session and fill it in similar to the example below.
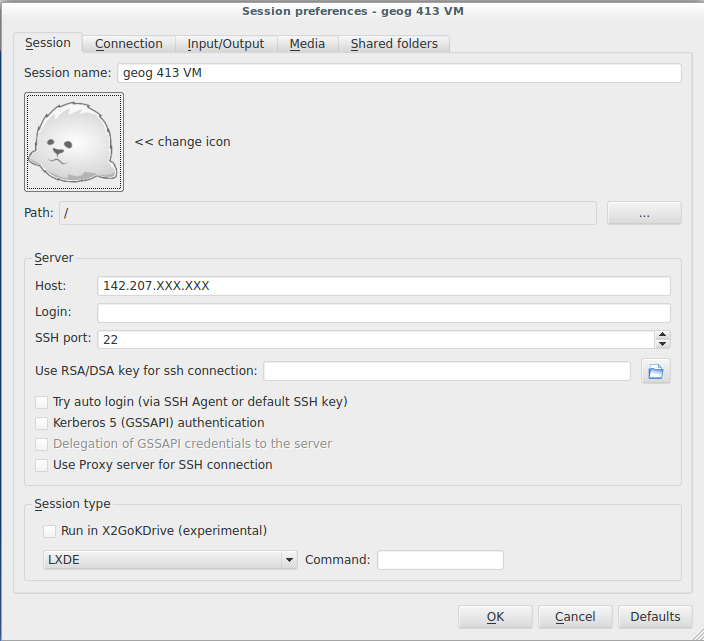
Click OK –> then double click to connect to the Debian VM (login with the user and password you created for the VM).
If it worked, log off from Remote Desktop and carry on working in x2go.
Installing PostGIS 
We can use either command line, or synatic to install postgis. Well that was a whole section completed – installing PostGIS.
PostGIS with QGIS
Creating a database and adding the PostGIS extension
Create a database
We will use both pgadmin and the command line to practice these steps before creating a nice template database for use this semester. Have a look at the PostGIS documentation before you start
PGAdmin
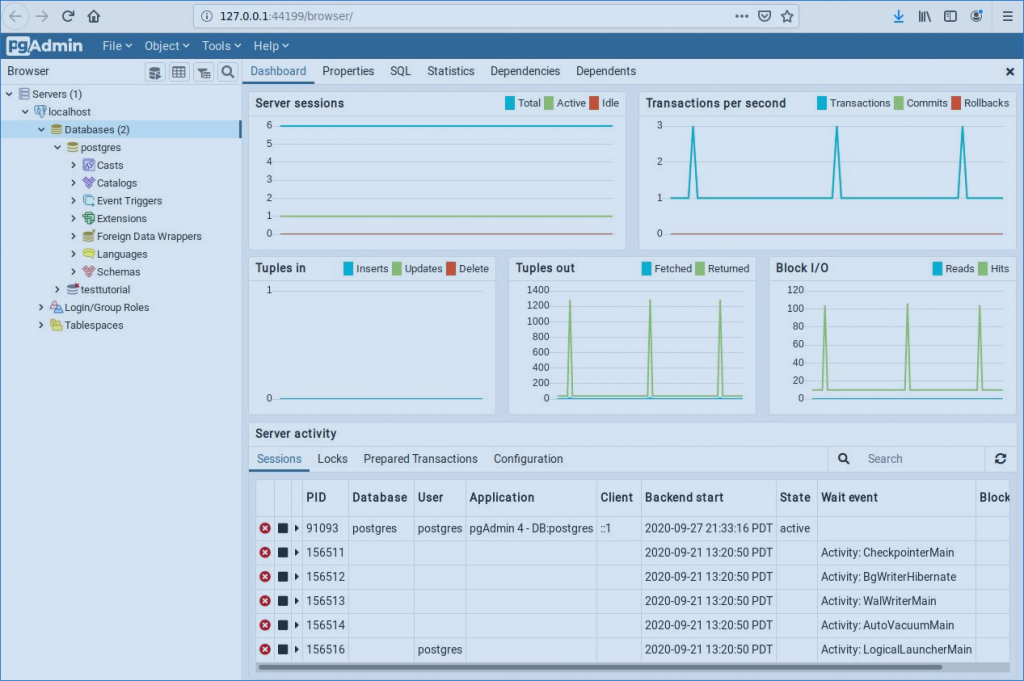
PgAdmin provides an graphical view of Postgresql and is wonderful for all sorts of interactions with you server and databases. If you have it set up properly you should have a view similar to this
You can right click on database to create a new database – call it testtemp1.
Once the database you created, try to install the PostGIS extension. See if you can figure out how to do it. Install postgis-raster and postgis-topology extensions.
Command Line
Using the command line, we will re-produce the same results.
In the terminal carry out the commands below (by the way type ahead works in postgres as well):
- sudo su – postgres
- createdb testtemp2
- psql -d testtemp2
- create extension postgis;
- create extension postgis_raster;
Review your results
- /d
- /dx
- or review the results in PgAdmin (you will have to refresh the databases to see the the database created with the command line)
Create a template database with the postgis extensions
Repeat the steps above to create a new database called postgistemplate
Drop the test databases
PgAdmin – right click on the database –> delete/drop
command line
- exit managing the database in psql by typing “\q”
- dropdb “thenameofthedatabase”
Create a database for QGIS
Create a database for use in QGIS using the postgistemplate database as your template
PGAdmin
- create a new database by launching the create database panel
- name it under the “general” tab
- select the postgistemplate database under “template” in the “definition” tab
Command line
- createdb gistest -T postgistemplate
Connect and load data from your database in QGIS
Connect to the database
Follow these steps to connect to the database in QGIS:
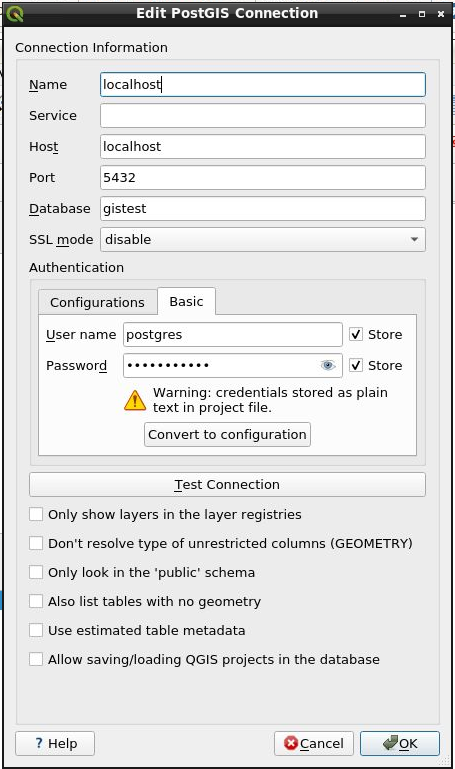
- right click on the PostGIS elephant in the browser –> new connection
- set up a connection following the setup in the image below
You now have a connection to the database, but no data in the database
Loading data into postgis from QGIS
Adding an existing layer into PostGIS is very simple
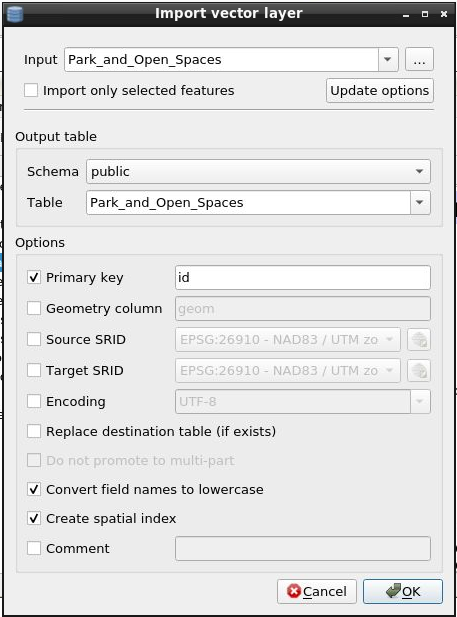
- open the DB manager under the database menu
- use import vector layer button and fill in the panel as below
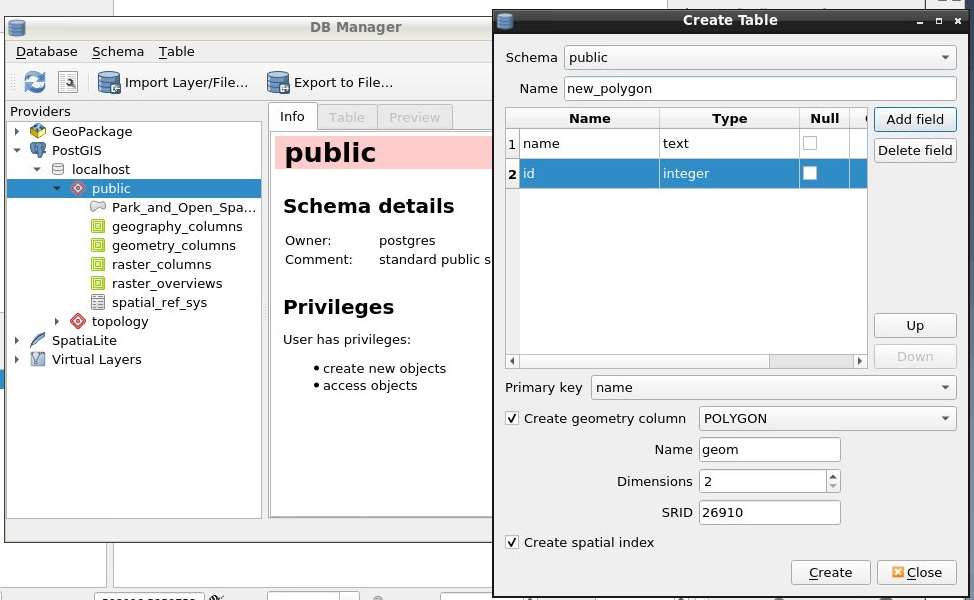
To create a new layer in PostGIS
- highlight the public schema in the database tree
- click the table menu –> create table
- create a layer as shown below
You should have also noticed by now, you can simply drag the layer (table) into QGIS from DB Manager