Git Init
When using git repositories your project folder is presented to the operating system simply as a folder with files. There is also a hidden folder named .git that is used by git to track changes.
The .git folder contains information about where the repository is hosted, and the changes between versions. If you use git to change to a different version, it applies these differences to the files as opposed to being a complete copy.
To create a git repositry, open a terminal and navigate to where you would like the repository to exist, make a directory with the name as the project and enter the command
git init
Git Ignore
A git ignore file allows us to define files that we do not want to store in a repository, common examples of this is we generally do not want to store data, results, or passwords with our code.
A git ignore file is a simple text file with no name, and the extension .gitignore, and is simply a list of files, directories or extensions that we do not want to push into our repositories.
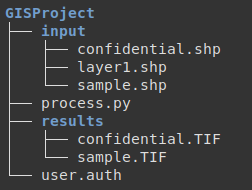
If we want to ignore a spific file we can simply put its name in the .gitignore, for example, lets say we have some plain text passwords in user.auth, we can stop it being synced to the repository.
user.auth
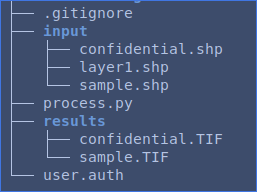
Save the file, and your gitignore should look like this in the file tree.
The danger of versioning
Note that if you were to commit changes with the user.auth file, then add the git ignore, at the surface it may appear that you removed the user.auth file, however it may be possible for someone to retreive your passwords by reverting to a previous version before the file was ignored.
Best practice is to never store credentials with your code, if you must put credentials in a seperate file that will be parsed at runtime, and add the authentication file to git ignore before saving credentials.
Git is primarly for storing source code and tracking the changes, if you have large static files you most likely do not want them in your version controls. For example if we want to stop image files such as GeoTiffs from being included we could use this line
*.TIF
File Extensions
Not all programs use the same extensions for the same type of file, for example a GeoTiff may have .TIF .tif .TIFF .tiff as all common options. Make sure extensions in your ignore match the files you have.
Now lets say we want to have our code in version controll but it is used to process confidential information we do not wish to share you may want to do something like this
/input/*
!/input/sample.*
/results/*
In this case we have told git to ignore all the files within input and results directories. But in line 2 we unignored (!) and file name starting with sample, in this case we can distribute som test data without versioning confidential data.
Commit
Git is a version control system, thus we need to make versions, versions are created by ‘commiting’ our code. First we select the files to commit using git add, for example
git add process.py
alternativly we can add all files not ignored using the -a flag
git add -a
you can see the summary of changes using git status
$git status
On branch master

No commits yet

Changes to be committed:
  (use "git rm --cached <file>..." to unstage)

	new file:   .gitignore
	new file:   input/sample.shp
	new file:   process.py
now we commit the version with ‘git commit’.
Your default text editor will open asing for a commit comment, this is just asking for a one sentenice what is new in this version.
git commit
[master (root-commit) 7c2c1fc] This is my first commit
 3 files changed, 5 insertions(+)
 create mode 100644 .gitignore
 create mode 100644 input/sample.shp
 create mode 100644 process.py
Push
For your fist push you will need to set up a repository, go to https://csgit.unbc.ca and log in with your UNBC credentials.
Make a new project name it geog413-<usernae>, and make sure the visibility is set to private.
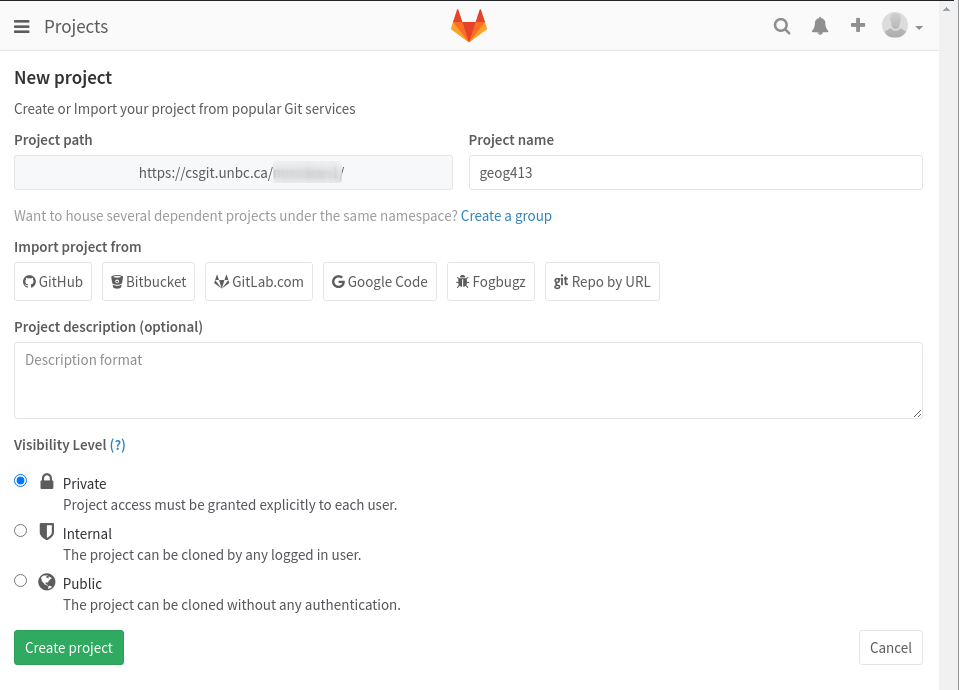
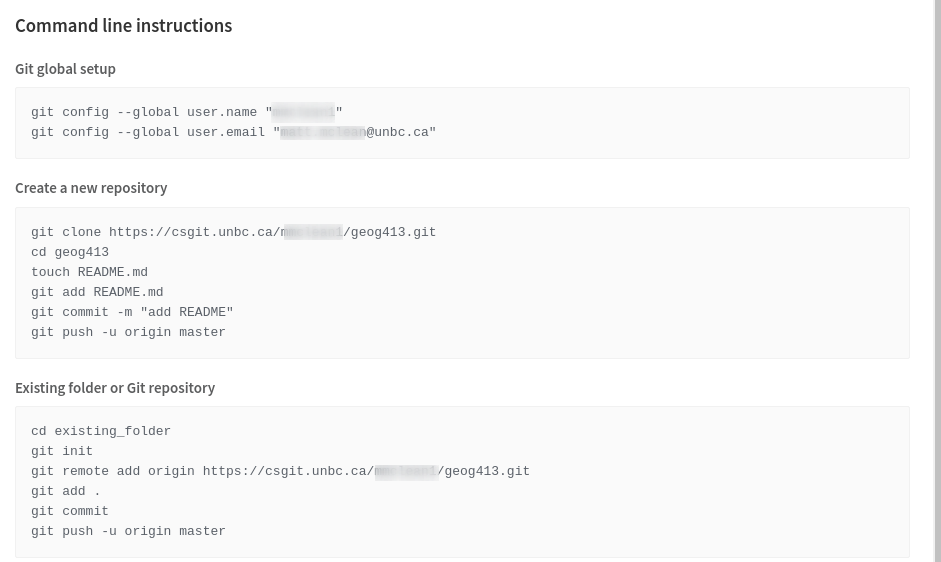
You will be taken to a page with set up instructions, complete the sections Git global setup, and Existing folder or Git repository. (Note if you want to copy your work to another computer, complete the global setup, and then git clone just as the first line of Create a new repository)
Pull
If changes have been made on the remote server by another user, or yourself on a different computer you can get the changes on your local computer with the command. If you are working on a project with multiple people it is a good idea to pull before you start working.
git pull
Branch
When working on larger projects you may be working on features that you do not want others on your team to have access to until they are finished, but you still want to be able to push your work as a backup or for moving between computers. This is completed with the branch command.
git branch my-branch
git checkout my-branch
Now that you are in your new branch make a new text file and commit it. When you are finished checkout master. Look for your file, you should find that your folder looks exactly as it did before you created a new branch, to get your file back simply checkout your new branch.
Merge
Finally, after you are done the work on your new branch you will want to integrate it into the master branch, to do this, checkout master then run the command
git merge my-branch
Git will attempt to automatically merge all of your files together, however if the same file has been edited on your branch and master you may get a message about a conflict.

For this example, each branch had a text file with a single line of code, after the merge it looks like this
<<<<<<< HEAD
This line was made in master branch
=======
This edit was made on my-branch
>>>>>>> my-branch
To resolve this conflict, you need to manually edit this file to help git understand what you want the line to be, the conflict is marked by <<<<<<< Head <Current branch edits> ======== <Branch being merged edits> >>>>>> my-branch. For this example before you can commit and push the merge lines 1, 3, and 5 will need to be deleted (once you are done using them as separators between the code), and you will need to decide to keep line 2, 4, 2 & 4, or edit the line to a compromise between them. Once you are done the file can be saved, committed, and pushed.
Share Repository
As you will be submitting homework for future assignments inside of your git project, share it with your instructor. Open settings in the upper right corner >> Members.
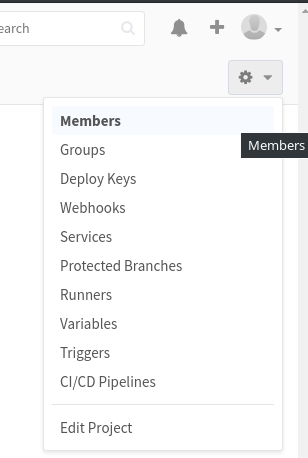
Add your instructor with the Project Access “Master”